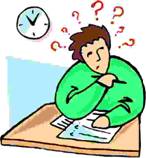
 It's January. How did the start of the school year fly by so fast? With the school year coming closer and closer to the 100 day mark, it's time to start thinking about some other major school events that are coming up for many of us. I'm talking about the impending state assessments.
Now, I am not one to ever teach to the test---but I think some quality lessons can be taught,and at the same time, help students to do well on the state exams.
In my class, I teach test-taking as another genre. I make a promise to my students that we will not only learn the material on the test, but what the test looks like too. Reading strategies and critical thinking skills do have a place in the testing arena. Tips are good, but if you are serious about teaching through the test and not to it...it is important to start sooner then later. I wrote an article for the Really Good Stuff Blog about it last year, and I'm posting it now for anyone who is interested.
Questions? Ask away :)
Here it is, hope it helps: Test Taking as a Genre by Nichole Rozakos
It's January. How did the start of the school year fly by so fast? With the school year coming closer and closer to the 100 day mark, it's time to start thinking about some other major school events that are coming up for many of us. I'm talking about the impending state assessments.
Now, I am not one to ever teach to the test---but I think some quality lessons can be taught,and at the same time, help students to do well on the state exams.
In my class, I teach test-taking as another genre. I make a promise to my students that we will not only learn the material on the test, but what the test looks like too. Reading strategies and critical thinking skills do have a place in the testing arena. Tips are good, but if you are serious about teaching through the test and not to it...it is important to start sooner then later. I wrote an article for the Really Good Stuff Blog about it last year, and I'm posting it now for anyone who is interested.
Questions? Ask away :)
Here it is, hope it helps: Test Taking as a Genre by Nichole Rozakos
One of my favorite ways to teach-or reteach-arrays is through a project called Candy Box Math. I think it's a favorite of my kids too.
Now of course, the great Marilyn Burns first created this project and you can see the directions here: Candy Box Math by Marilyn Burns.
I created a cute Candy Box Math Letter to go along with the project, and really get the kids excited. I also created a display so that students could get into groups and create posters to show off. In the past, I have even done an extensional persuasive paragraph that the kids write-up to explain why there candy bar should be made by a real candy company. I have even sent them away to Hershey's -but never received anything back. :(

The display shows the math work done on the left. On the right, there is a candy bar design with logo and flavors listed. Underneath, is the winning array and a few sentences explaining why the kids think this is the best possible packaging for the new candy bar (for this we have a discussion about traditional vs. unique, storage, space it takes up, etc.) The labels are: Candy Box Research, Candy Box Design, and Packaging
Each year I struggle to come up with a holiday gift for kids to make for their loved ones. Though I have made some successfully cute gifts in the past, this year I found myself in an especially difficult predicament. No money to spend on crafts (it can get expensive, you know) and no time left to make anything!
My partner and I went scrambling, and when you need inspiration, there is no better place to look the internet. We found these cute paper ornaments, and simply added our own touches to make them our own.
We found the idea here: http://familyfun.go.com/crafts/paper-drops-664201/ . Instead of using construction paper, I went to a craft store and purchased a book of scrapbook paper. It was on sale (score!) and some spools of ribbon. The paper was strong like tagboard. I cut it into two inch wide strips of 12" and 9 1/2", like the website says. Since the paper was only decorated on one side, I had the students decorate the plain sides of the paper. They decorated the longer strips with pictures, and patterns. They wrote a heartfelt message on the shorter strips. I walked around stapling the paper and ribbon into the heart shape. The students then dipped the edge of one side into glue and then into glitter. Tah-dah! Beautiful, classic, and meaningful! I got some really wonderful feedback from parents too!
Cost: $10.00-$15.00
Time: 30 minutes for the whole class to complete +drying time
So to start my first official blog entry on teaching, I chose to write about an idea my partner and I created. This is a group project, pop-out learning board. A learning board is a bulletin board but people who walk by can learn from it!
Students worked in groups of 3 or 4 and were assigned a planet or element in space. The groups created their action plan, and organized themselves and what they would need. They had to do research about the planet/ celestial being. When they were finished, they got to paint and create their part of space. For the planets, we used various circle sizes (we used a garbage can for Neptune/Uranus and then went larger and smaller from there.) After drawing the circle, we drew another circle around it. This extra part was used to tuck and staple when we were making the bulletin board. Students who had comets/stars/meteorites got white paper and decided how they would look. While the students studied pictures of planets to decide colors, the teachers typed up the information learned. This insured spelling accuracy and neatness.
After all pieces were done it was time to create the board, we tucked in the extra paper and stapled the under part of the planet/sun. We would stuff recycled newspaper into each planet, and staple up the sides as we stuffed. We added the other space elements and facts to the board. Lastly, we included a little sign saying "You can learn, but please don't touch!" This is a favorite among students and passing-by parents!
This project took about 1 class block of time to organize and research facts, and one day of painting (not including drying time!)
For the learning board/groups:
*Sun
*Planets
*Dwarf Planet(s)-We chose to only do Pluto
*Moon(s)-We chose to only do Earth's moon
*Asteroid belt
*Stars
*Comets
*Meteorites
Extras: In the past, we have needed extra groups, so we have done Space Exploration Facts (and an added spaceship) and once I had a student who wanted to do aliens, so he researched some myths/sightings.
Postin' for the first time!
Hello! My name is Nikki Rozakos and I'm throwing my hat into the teaching blog world...I have been an internet scavenger since my first year teaching, 6 years ago..but lately the world of teaching resources has literally gone viral! Anything you could ever want is out there (and it's probably a better idea then you had in the first place!) Discovering Pinterest was the final straw. I see so many ideas, and I have some of my own to add, but no home base for my idea to start, live and grow. So voila-Teach n' tech! I will comb the internet searching for the latest and greatest (not to mention cutest!) teaching ideas out there and even add some of my own.
Welcome!
Nikki


